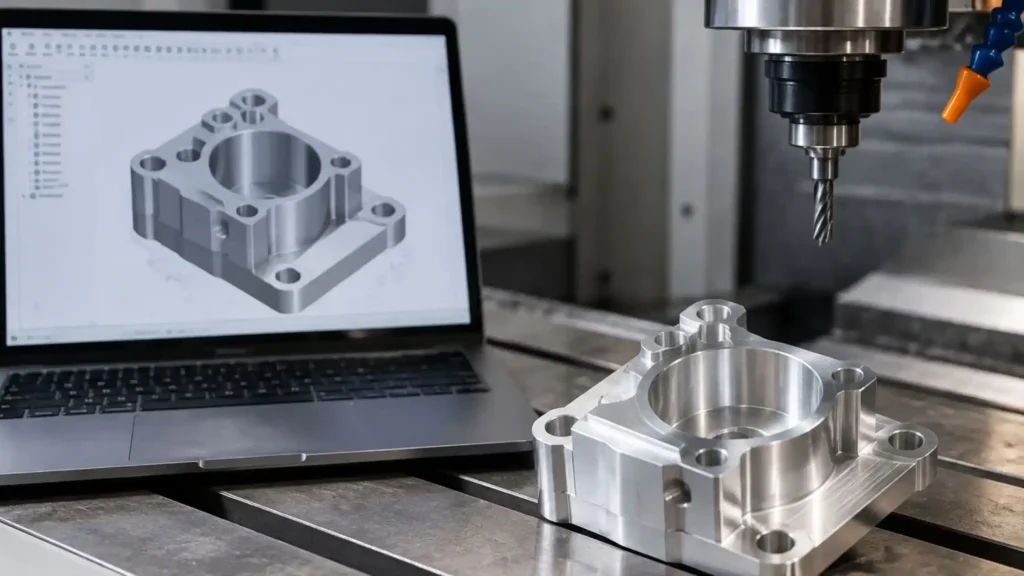
Turning a product idea into a working prototype requires more than a digital design. CNC machining for prototyping converts CAD models into accurate physical parts that can be tested for fit, function, dimensions, and performance.
CNC prototyping is useful for product designers, engineers, startups, OEMs, and R&D teams that need functional parts before moving into larger-scale production. The process allows teams to identify design issues early and make changes before committing to full production.
What Is CNC Prototyping?
CNC prototyping is the process of using computer-controlled machining to manufacture physical prototypes directly from a CAD design. The process can produce prototypes from materials such as aluminium, steel, brass, plastics, and other engineering materials.
Unlike visual prototypes, CNC-machined prototypes can closely represent the final manufactured component. This makes them useful for functional testing, dimensional validation, assembly checks, and product development.
A typical CNC prototyping workflow includes:
- Creating or finalising the CAD model.
- Selecting the appropriate material.
- Preparing the machining program.
- Setting up the CNC machine.
- Machining the prototype.
- Applying the required finishing.
- Inspecting dimensions and tolerances.
- Testing the finished prototype.
The same digital design can also be revised and machined again when changes are required.
How Does CNC Machining Turn a CAD Model Into a Prototype?
CNC machining turns a CAD model into a prototype through a sequence of digital preparation, material setup, machining, and inspection steps.
1. CAD Model Preparation
The process starts with a 3D CAD model or engineering drawing. The design defines the dimensions, geometry, holes, features, and required tolerances of the component.
The engineering team reviews the model before machining. Features that are difficult or expensive to machine can be identified at this stage.
2. Material Selection
The material is selected according to the prototype’s intended function. Aluminium is commonly used when low weight and machinability are important. Steel may be selected when the prototype requires greater strength.
Material selection should consider:
- Mechanical strength
- Weight
- Heat resistance
- Corrosion resistance
- Machinability
- Final application
3. CNC Programming
The CAD geometry is converted into machine instructions through CAM software. The machining strategy determines how the cutting tools will remove material from the workpiece.
Tool selection, cutting paths, machining operations, and setup requirements are considered during this stage.
4. CNC Machining
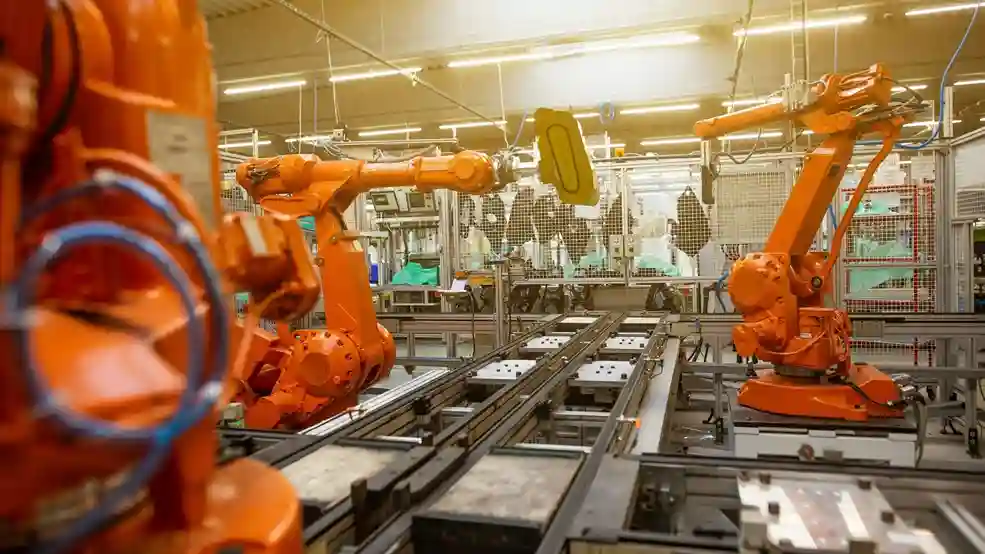
The selected material is secured in the machine. Cutting tools then remove material according to the programmed toolpaths.
Depending on the prototype geometry, operations can include milling, drilling, turning, boring, and other machining processes.
5. Finishing and Inspection
After machining, the prototype may require finishing operations. These can improve its appearance, surface characteristics, or functional properties.
The finished part is then inspected against the CAD model or engineering drawing. Measurements can verify critical dimensions and tolerances before the prototype enters testing.
Why Use CNC Machining for Functional Prototypes?
CNC machining is useful for functional prototypes because it can produce parts from production-grade engineering materials with controlled dimensions.
A CNC prototype can help teams evaluate:
- Fit: Whether the component fits correctly with other parts.
- Function: Whether the component performs its intended mechanical function.
- Dimensions: Whether manufactured features match the design.
- Assembly: Whether multiple components work together correctly.
- Material performance: Whether the selected material is suitable for the application.
- Manufacturability: Whether the design can move toward production without major changes.
This makes CNC prototyping particularly useful when a product needs physical testing before mass production.
What Materials Can Be Used for CNC Prototyping?
CNC prototyping supports a wide range of materials, allowing engineers to select materials that match the intended application.
Common options include:
| Material | Typical prototype applications |
| Aluminium | Housings, brackets, automotive and industrial components |
| Stainless steel | Functional parts requiring corrosion resistance |
| Mild steel | Structural and mechanical components |
| Brass | Electrical and mechanical components |
| Engineering plastics | Lightweight housings and functional components |
The appropriate material depends on the prototype’s mechanical, thermal, electrical, and environmental requirements.
When Should You Choose CNC Machining for Prototyping?
CNC machining is a suitable prototyping method when the prototype needs accurate dimensions, functional testing, or production-representative materials.
It is particularly useful when:
- The component has tight dimensional requirements.
- The prototype must withstand mechanical testing.
- The final product will use machined metal or engineering plastic.
- Engineers need to verify assembly and fit.
- The design requires complex machined features.
- A small batch of functional prototypes is required.
- The prototype needs to closely represent the final production component.
CNC machining can also support the transition from prototype development to low-volume manufacturing.
CNC Prototyping vs Other Prototyping Methods
Different prototyping methods serve different development requirements. CNC machining is particularly relevant when the prototype needs functional performance and material characteristics similar to the intended production component.
| Requirement | CNC Prototyping | 3D Printing |
| Metal prototypes | Strong option | Depends on technology |
| Dimensional accuracy | High | Technology dependent |
| Production-grade materials | Available | Material dependent |
| Functional testing | Suitable | Suitable for selected applications |
| Surface finish | Can be machined and finished | Technology dependent |
| Low-volume production | Suitable | Suitable for selected parts |
The right method depends on the part geometry, material, accuracy requirements, quantity, and testing requirements.
How CNC Prototyping Helps Reduce Product Development Risk
CNC prototyping helps identify design problems before full-scale manufacturing begins. Physical testing can reveal issues that may not be obvious from a CAD model alone.
For example, a prototype can reveal:
- Incorrect component dimensions
- Assembly interference
- Poor component fit
- Insufficient clearance
- Material selection problems
- Functional performance issues
- Manufacturing limitations
Finding these problems during prototyping can reduce the need for expensive production-stage modifications.
How to Prepare a CAD Model for CNC Prototyping
A CNC-ready CAD model should contain clear geometry and manufacturing information. Engineers should review the design before sending it for machining.
Important considerations include:
- Define critical dimensions clearly.
- Specify required tolerances.
- Identify material requirements.
- Avoid unnecessary complexity.
- Consider tool access during machining.
- Identify holes and threads clearly.
- Specify required surface finishes.
- Provide technical drawings when required.
A manufacturing partner can also review the design and identify potential machining issues before production.
Why Choose CNC Machining Services in India for Prototyping?
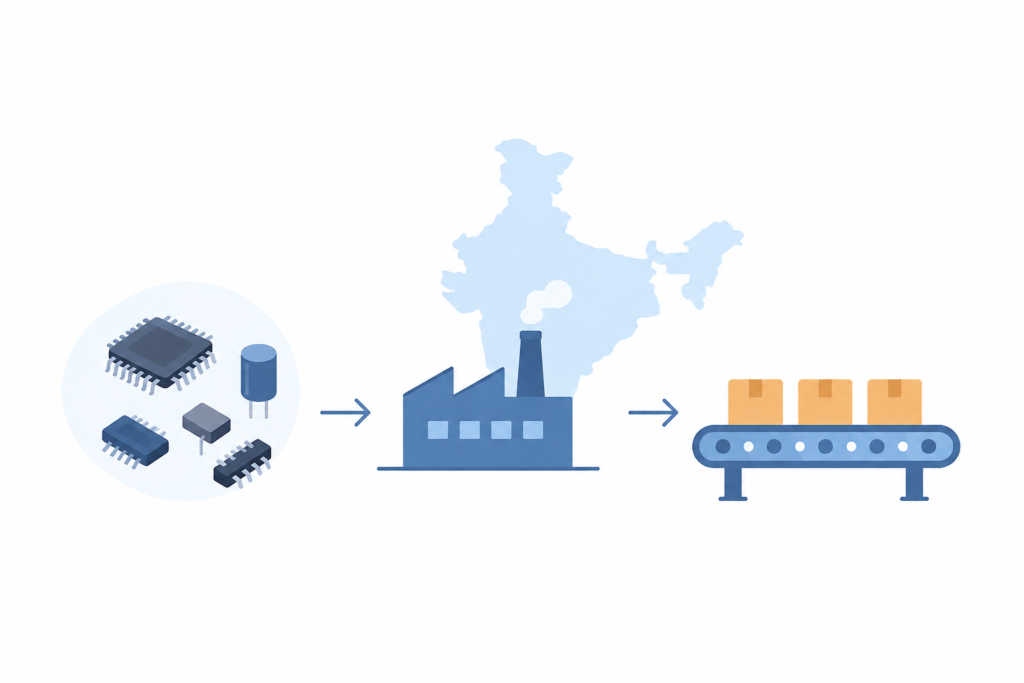
India has a growing manufacturing ecosystem supporting CNC machining, engineering components, product development, and industrial manufacturing.
For businesses seeking CNC machining services in India, the right manufacturing partner can support the complete prototype development process, from CAD review and material selection to machining and inspection.
Venttup provides CNC machining capabilities for businesses that require precision components, prototypes, and low-volume manufacturing support. Its CNC machining service can be considered when a project requires a manufacturing partner for moving from digital design to physical parts.
How to Move From CAD Model to a CNC Prototype
The process becomes straightforward when the project requirements are clearly defined.
Step 1: Finalise the CAD model.
Step 2: Prepare technical drawings and tolerances.
Step 3: Select the prototype material.
Step 4: Define the required quantity.
Step 5: Share the design files with the CNC machining provider.
Step 6: Review manufacturability and machining requirements.
Step 7: Manufacture the prototype.
Step 8: Inspect the finished component.
Step 9: Test the prototype.
Step 10: Update the CAD design if required and proceed to the next iteration.
This approach allows product teams to validate the physical component before committing to larger production quantities.
FAQs About CNC Prototyping
Below is the full blog based on your uploaded brief, keeping the focus on CNC prototyping, the CAD-to-functional-prototype process, commercial intent, and Venttup’s CNC machining services in India.
CNC Machining for Prototyping: From CAD Model to Functional Prototype
Turning a product idea into a working prototype requires more than a digital design. CNC machining for prototyping converts CAD models into accurate physical parts that can be tested for fit, function, dimensions, and performance.
CNC prototyping is useful for product designers, engineers, startups, OEMs, and R&D teams that need functional parts before moving into larger-scale production. The process allows teams to identify design issues early and make changes before committing to full production.
What Is CNC Prototyping?
CNC prototyping is the process of using computer-controlled machining to manufacture physical prototypes directly from a CAD design. The process can produce prototypes from materials such as aluminium, steel, brass, plastics, and other engineering materials.
Unlike visual prototypes, CNC-machined prototypes can closely represent the final manufactured component. This makes them useful for functional testing, dimensional validation, assembly checks, and product development.
A typical CNC prototyping workflow includes:
- Creating or finalising the CAD model.
- Selecting the appropriate material.
- Preparing the machining program.
- Setting up the CNC machine.
- Machining the prototype.
- Applying the required finishing.
- Inspecting dimensions and tolerances.
- Testing the finished prototype.
The same digital design can also be revised and machined again when changes are required.
How Does CNC Machining Turn a CAD Model Into a Prototype?
CNC machining turns a CAD model into a prototype through a sequence of digital preparation, material setup, machining, and inspection steps.
1. CAD Model Preparation
The process starts with a 3D CAD model or engineering drawing. The design defines the dimensions, geometry, holes, features, and required tolerances of the component.
The engineering team reviews the model before machining. Features that are difficult or expensive to machine can be identified at this stage.
2. Material Selection
The material is selected according to the prototype’s intended function. Aluminium is commonly used when low weight and machinability are important. Steel may be selected when the prototype requires greater strength.
Material selection should consider:
- Mechanical strength
- Weight
- Heat resistance
- Corrosion resistance
- Machinability
- Final application
3. CNC Programming
The CAD geometry is converted into machine instructions through CAM software. The machining strategy determines how the cutting tools will remove material from the workpiece.
Tool selection, cutting paths, machining operations, and setup requirements are considered during this stage.
4. CNC Machining
The selected material is secured in the machine. Cutting tools then remove material according to the programmed toolpaths.
Depending on the prototype geometry, operations can include milling, drilling, turning, boring, and other machining processes.
5. Finishing and Inspection
After machining, the prototype may require finishing operations. These can improve its appearance, surface characteristics, or functional properties.
The finished part is then inspected against the CAD model or engineering drawing. Measurements can verify critical dimensions and tolerances before the prototype enters testing.
Why Use CNC Machining for Functional Prototypes?
CNC machining is useful for functional prototypes because it can produce parts from production-grade engineering materials with controlled dimensions.
A CNC prototype can help teams evaluate:
- Fit: Whether the component fits correctly with other parts.
- Function: Whether the component performs its intended mechanical function.
- Dimensions: Whether manufactured features match the design.
- Assembly: Whether multiple components work together correctly.
- Material performance: Whether the selected material is suitable for the application.
- Manufacturability: Whether the design can move toward production without major changes.
This makes CNC prototyping particularly useful when a product needs physical testing before mass production.
What Materials Can Be Used for CNC Prototyping?
CNC prototyping supports a wide range of materials, allowing engineers to select materials that match the intended application.
Common options include:
| Material | Typical prototype applications |
| Aluminium | Housings, brackets, automotive and industrial components |
| Stainless steel | Functional parts requiring corrosion resistance |
| Mild steel | Structural and mechanical components |
| Brass | Electrical and mechanical components |
| Engineering plastics | Lightweight housings and functional components |
The appropriate material depends on the prototype’s mechanical, thermal, electrical, and environmental requirements.
When Should You Choose CNC Machining for Prototyping?
CNC machining is a suitable prototyping method when the prototype needs accurate dimensions, functional testing, or production-representative materials.
It is particularly useful when:
- The component has tight dimensional requirements.
- The prototype must withstand mechanical testing.
- The final product will use machined metal or engineering plastic.
- Engineers need to verify assembly and fit.
- The design requires complex machined features.
- A small batch of functional prototypes is required.
- The prototype needs to closely represent the final production component.
CNC machining can also support the transition from prototype development to low-volume manufacturing.
CNC Prototyping vs Other Prototyping Methods
Different prototyping methods serve different development requirements. CNC machining is particularly relevant when the prototype needs functional performance and material characteristics similar to the intended production component.
| Requirement | CNC Prototyping | 3D Printing |
| Metal prototypes | Strong option | Depends on technology |
| Dimensional accuracy | High | Technology dependent |
| Production-grade materials | Available | Material dependent |
| Functional testing | Suitable | Suitable for selected applications |
| Surface finish | Can be machined and finished | Technology dependent |
| Low-volume production | Suitable | Suitable for selected parts |
The right method depends on the part geometry, material, accuracy requirements, quantity, and testing requirements.
How CNC Prototyping Helps Reduce Product Development Risk
CNC prototyping helps identify design problems before full-scale manufacturing begins. Physical testing can reveal issues that may not be obvious from a CAD model alone.
For example, a prototype can reveal:
- Incorrect component dimensions
- Assembly interference
- Poor component fit
- Insufficient clearance
- Material selection problems
- Functional performance issues
- Manufacturing limitations
Finding these problems during prototyping can reduce the need for expensive production-stage modifications.
How to Prepare a CAD Model for CNC Prototyping
A CNC-ready CAD model should contain clear geometry and manufacturing information. Engineers should review the design before sending it for machining.
Important considerations include:
- Define critical dimensions clearly.
- Specify required tolerances.
- Identify material requirements.
- Avoid unnecessary complexity.
- Consider tool access during machining.
- Identify holes and threads clearly.
- Specify required surface finishes.
- Provide technical drawings when required.
A manufacturing partner can also review the design and identify potential machining issues before production.
Why Choose CNC Machining Services in India for Prototyping?
India has a growing manufacturing ecosystem supporting CNC machining, engineering components, product development, and industrial manufacturing.
For businesses seeking CNC machining services in India, the right manufacturing partner can support the complete prototype development process, from CAD review and material selection to machining and inspection.
Venttup provides CNC machining capabilities for businesses that require precision components, prototypes, and low-volume manufacturing support. Its CNC machining service can be considered when a project requires a manufacturing partner for moving from digital design to physical parts.
How to Move From CAD Model to a CNC Prototype
The process becomes straightforward when the project requirements are clearly defined.
Step 1: Finalise the CAD model.
Step 2: Prepare technical drawings and tolerances.
Step 3: Select the prototype material.
Step 4: Define the required quantity.
Step 5: Share the design files with the CNC machining provider.
Step 6: Review manufacturability and machining requirements.
Step 7: Manufacture the prototype.
Step 8: Inspect the finished component.
Step 9: Test the prototype.
Step 10: Update the CAD design if required and proceed to the next iteration.
This approach allows product teams to validate the physical component before committing to larger production quantities.
FAQs
What is CNC prototyping?
CNC prototyping is the process of machining a physical prototype directly from a CAD design using computer-controlled CNC equipment.
Is CNC machining suitable for functional prototypes?
Yes. CNC machining is suitable for functional prototypes that need accurate dimensions, engineering materials, and physical testing.
Can CNC machining produce metal prototypes?
Yes. CNC machining can produce prototypes from materials such as aluminium, steel, stainless steel, and brass.
Is CNC prototyping suitable for small batches?
Yes. CNC machining can be used for prototypes as well as small-batch and low-volume component production.
What files are needed for CNC prototyping?
A 3D CAD model is commonly used for CNC machining. Technical drawings with dimensions and tolerances can also help define manufacturing requirements.
Get Your Prototype From CAD to Production
A CAD model is the starting point. CNC prototyping turns that digital design into a physical component that can be measured, assembled, tested, and refined.
For businesses looking for CNC machining services in India, Venttup can support prototype and low-volume manufacturing requirements. Share your CAD design and project requirements to discuss the right machining approach for your component.
.
Get Your Prototype From CAD to Production
A CAD model is the starting point. CNC prototyping turns that digital design into a physical component that can be measured, assembled, tested, and refined.
For businesses looking for CNC machining services in India, Venttup can support prototype and low-volume manufacturing requirements. Share your CAD design and project requirements to discuss the right machining approach for your component.